

How to Practice Suturing at Home: Complete Guide for Medical Students
Hoss Agina
Dec 13, 2025
Learning how to practice suturing at home has become essential for medical students who want to master this fundamental skill before entering clinical rotations. While traditional medical education often provides limited hands-on practice time, developing proficiency requires significantly more repetition than most programs offer.
Research published in JAMA Dermatology demonstrates that students receiving spaced reinforcement training achieve 91.7% pass rates compared to 0% for single sessions, making home practice crucial for long-term skill retention. This comprehensive guide covers everything you need to establish an effective home suturing practice routine.
Key Takeaways
- Research proves spaced practice achieves 91.7% proficiency rates compared to 0% for single training sessions
- Students need 41-74 practice sutures distributed over multiple sessions to achieve lasting competency
- High-quality synthetic pads, biological tissue, and even fruit materials can effectively support skill development
- Proper safety protocols and sharps management must be followed consistently during all practice sessions
Master Your Suturing Skills with Professional-Grade Tools
Ready to accelerate your suturing education? The All-in-One Suture Practice Kit provides everything you need for comprehensive home practice, including our engineer-designed, tear-resistant suture pad, complete toolset, instructional materials, and carrying case.
With over 970 five-star reviews from medical students, nursing students, and healthcare professionals, this kit delivers the realistic practice experience that builds lasting clinical confidence.
Setting Up Your Home Practice Space
Creating an organized practice environment is the foundation of effective skill development. Your workspace should include:
Essential Equipment:
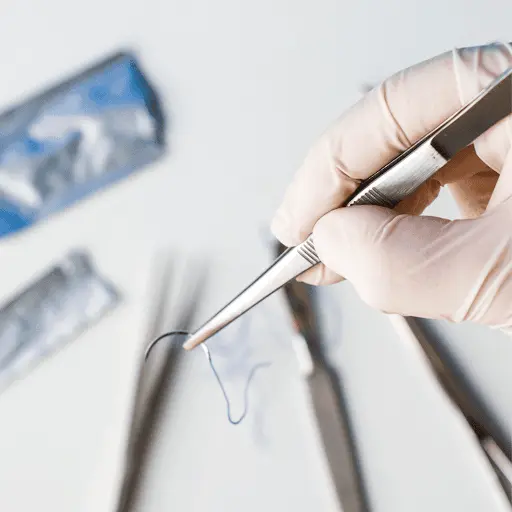
- Needle holder - The primary instrument for grasping surgical needles
- Tissue forceps - For handling and manipulating tissue
- Surgical scissors - For cutting suture thread and materials
- Practice pad or suitable practice materials
- Proper task lighting positioned directly above your work area
- Clean, flat surface at appropriate height for comfortable positioning
Safety Considerations:
The CDC reports approximately 385,000 needlestick injuries annually in healthcare settings, making proper safety habits essential even during practice. Always use instruments to handle needles, never your bare hands, and prepare appropriate sharps disposal containers.
Your practice space should maintain proper ergonomics to prevent strain during extended sessions. Position your work surface so your elbows remain at 90-100 degrees when seated, and ensure adequate lighting to avoid excessive forward leaning.
Choosing the Right Practice Materials
Selecting appropriate practice materials directly impacts your skill development and learning outcomes. You have several effective options:
High-Quality Synthetic Pads
Suture practice kits featuring synthetic pads offer the most consistent and durable practice experience. These medical-grade materials provide:
- Realistic tissue resistance and feedback
- Multi-layer construction for practicing different suturing techniques
- Reusable design that supports extended practice sessions
- Standardized properties that ensure consistent learning
When choosing the right suture practice kit, prioritize products engineered specifically for medical education rather than generic alternatives.
Biological Tissue Alternatives
Fresh animal tissue from local butchers provides realistic practice at minimal cost. Options include:
- Pig skin - Closest approximation to human tissue properties
- Chicken breast - Softer texture suitable for delicate technique work
- Beef tongue - Tougher tissue for developing strength and control
Accessible Fruit-Based Materials
Research published in the Medical Journal of Australia found that 21 of 21 trainees successfully completed simple interrupted sutures on banana peels, making fruits surprisingly effective for basic technique development.
Bananas work well for practicing:
- Simple interrupted sutures
- Vertical mattress sutures (18 of 21 success rate)
- Basic knot-tying techniques
Oranges provide thicker tissue simulation but show limitations for advanced techniques, with only 6 of 21 trainees completing vertical mattress sutures successfully.
Fundamental Suturing Techniques to Master
Simple Interrupted Suture
The simple interrupted suture forms the foundation of all suturing skills. This technique involves:
- Needle placement - Enter skin perpendicularly at 90 degrees, 4-8mm from wound edge
- Tissue traversal - Follow the needle's natural curve through tissue
- Exit positioning - Mirror entry angle on opposite wound edge
- Knot tying - Secure with surgeon's knot followed by square knots
Essential tools for this technique include your needle holder for precise needle control and tissue forceps for gentle tissue manipulation.
Continuous Suture
Continuous suture techniques offer time efficiency for longer wounds:
- Begin with single interrupted stitch to anchor
- Advance 4-8mm per bite along wound length
- Maintain consistent tension throughout closure
- Tie final throw to previous suture loop
This method spreads tension evenly and works excellently for straight, clean wounds.
Mattress Sutures
Mattress sutures provide superior wound edge eversion and strength:
Vertical Mattress:
- Deep bite 5-10mm from wound edge
- Shallow return bite 1-3mm from edge
- Excellent for thin skin prone to inversion
Horizontal Mattress:
- Wide tissue distribution reduces tension
- Ideal for fragile skin and high-tension areas
- Requires careful attention to avoid tissue strangulation
Subcuticular Suture
The subcuticular suture produces the best cosmetic outcomes by running beneath the skin surface. This advanced technique requires:
- Precise placement at epidermal-dermal junction
- Alternating sides while maintaining equal spacing
- Buried knots with no visible surface sutures
- Only suitable for low-tension, clean wounds
Selecting Appropriate Suture Materials
Understanding suture material characteristics ensures proper technique development:
Suture Size Selection
Following American Academy of Family Physicians guidelines, use:
- 5-0 or 6-0 sutures for facial wounds and delicate areas
- 4-0 sutures for most body areas
- 3-0 sutures for thick skin on back, scalp, palms, and soles
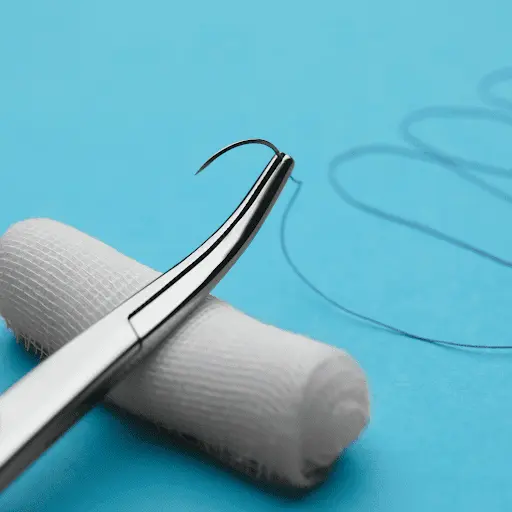
Material Types
Monofilament vs Multifilament:
- Monofilament - Single strand, higher memory, less tissue reaction
- Multifilament - Braided, easier handling, more secure knots
Absorbable vs Non-Absorbable:
- Absorbable - Body breakdown eliminates removal need
- Non-Absorbable - Permanent strength, requires removal
For home practice, monofilament sutures provide more realistic handling characteristics that transfer well to clinical settings.
Structured Practice Schedule for Skill Development
Medical students require systematic practice to achieve lasting proficiency. Research indicates you need approximately 41-74 practice sutures distributed over multiple sessions to reach competency.
Initial Training Phase (Weeks 1-3)
Week 1: Foundation Building
- Practice 4 times weekly, 30-45 minutes per session
- Focus exclusively on simple interrupted sutures
- Emphasis on even stitch spacing and proper needle angle
- Target: 10-15 quality sutures per session
Week 2: Technique Refinement
- Continue 4 weekly sessions
- Introduce running sutures while maintaining interrupted practice
- Focus on consistent tension control
- Target: 15-20 sutures per session mixing techniques
Week 3: Advanced Techniques
- Reduce to 3 sessions weekly, extend to 45-60 minutes
- Add mattress sutures and subcuticular techniques
- Practice different suturing techniques within single sessions
- Target: 20-25 sutures per session across multiple techniques
Maintenance Phase (Ongoing)
Spaced Reinforcement Schedule: After achieving initial proficiency, maintain skills through consistent practice of at least 10 repetitions every 10 days. This schedule prevents the skill degradation that occurs without regular reinforcement.
Advanced practitioners can reduce frequency to twice weekly while focusing on complex techniques and speed development.
Safety Protocols and Sharps Management
Proper safety habits developed during home practice protect you throughout your clinical practice career.
Needle Handling Rules
Never handle needles with bare fingers - always use instruments:
- Needle holders for surgical needles
- Forceps for needle positioning and adjustment
- Designated trays for needle storage and organization
Sharps Disposal
Use FDA-cleared sharps disposal containers made of puncture-resistant materials. For home practice, heavy-duty plastic containers clearly labeled and stored safely work as alternatives.
Never place needles in:
- Regular household trash
- Recycling containers
- Down toilets or drains
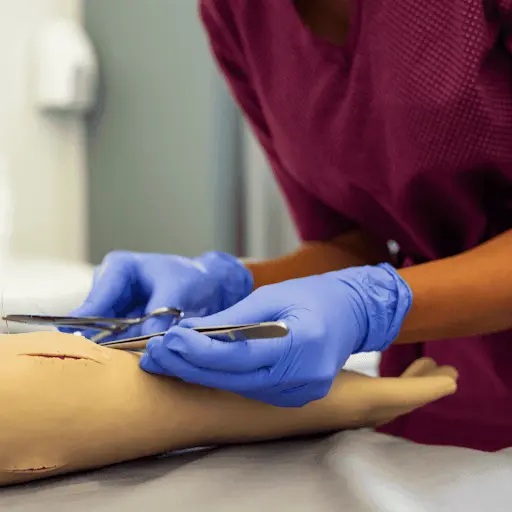
Personal Protective Equipment
Wear gloves during all practice sessions to develop the manual dexterity required for gloved surgical procedures. This adjustment period is crucial since gloved suturing requires different finger sensitivity and control.
Common Mistakes and Error Prevention
Understanding frequent errors allows you to develop correct technique from the beginning:
Needle Handling Errors
- Wrong angle - Driving needle toward wound rather than perpendicular
- Poor grip - Grasping needle at midpoint instead of 2/3 from tip
- Inadequate curve following - Fighting the needle's natural arc
Tissue Management Problems
- Excessive tension - Causing tissue blanching and potential necrosis
- Poor approximation - Leaving gaps between wound edges
- Edge inversion - Creating shadows that worsen scar appearance
Knot-Tying Difficulties
- Insufficient throws - Leading to knot failure and wound dehiscence
- Wrong technique - Moving needle driver instead of suture material
- Poor knot setting - Inadequate tightening or excessive force
Assessment and Feedback Methods
Objective evaluation accelerates your skill development:
Self-Assessment Checklists
Evaluate each practice session against standardized criteria:
- Appropriate suture size selection
- Proper needle loading at 2/3 distance from tip
- Perpendicular skin entry at 90 degrees
- Symmetrical bites on both wound sides
- Appropriate wound edge eversion
- Secure knot placement with proper tension
Video-Based Learning
- Record your practice sessions and compare against instructional videos. This allows:
- Slow-motion analysis of technique details
- Objective comparison with expert demonstrations
- Progress tracking over time
- Identification of specific improvement areas
Consider utilizing a comprehensive eBook & Video Course that provides structured learning progression with expert instruction.
Integrating Knot-Tying Skills
Master suturing requires exceptional knot-tying proficiency. The instrument tie (surgeon's knot) forms the foundation:
- Initial throw - Double loop around needle holder for locking action
- Subsequent throws - Single loops with minimum three total throws
- Tension control - Firm tightening without tissue strangulation
- Knot positioning - Placement to one side of wound for optimal healing
Practice knot-tying separately using a dedicated knot-tying simulator to develop muscle memory before integrating with suturing practice.
Transitioning from Practice to Clinical Settings
Home practice should prepare you for real surgical instruments and actual patients:
Skill Transfer Considerations
- Practice with realistic materials that approximate human tissue
- Use proper instruments identical to clinical settings
- Follow established safety protocols consistently
- Develop evaluation standards matching clinical expectations
Clinical Rotations Preparation
Before beginning rotations:
- Achieve consistent proficiency on multiple practice materials
- Master fundamental techniques before attempting advanced methods
- Understand anatomical considerations for different body regions
- Practice under simulated time pressure to build confidence
The transition becomes smoother when your home practice has established proper habits and muscle memory for core techniques.
Developing Your Suturing Skills Systematically
Suturing abilities develop through deliberate practice rather than casual repetition. Focus on:
Quality over quantity - Perfect technique execution with fewer repetitions outperforms rushed, high-volume practice with poor form.
Progressive complexity - Master simple interrupted sutures completely before advancing to continuous or mattress techniques.
Consistent evaluation - Regular assessment against objective standards prevents the development of bad habits.
Spaced repetition - Distributed practice sessions create lasting skill retention compared to massed practice.
The history of surgical sutures demonstrates how these fundamental techniques have evolved, but the core principles you're practicing remain essential to modern surgery.
Frequently Asked Questions
While human tissue provides the most realistic experience, high-quality synthetic pads offer consistent properties that support skill development effectively. Delicate skin characteristics vary significantly between individuals, making synthetic materials valuable for establishing foundational competence before encountering tissue variability in clinical settings.
Mastering suturing techniques requires four essential elements: proper needle handling and instrument control, understanding tissue mechanics and wound healing principles, developing consistent knot-tying proficiency, and maintaining appropriate tension throughout the closure process. These skills develop through systematic practice rather than intuitive learning.
Suture scissors feature specific blade angles and cutting surfaces designed for precise thread cutting without disturbing surrounding tissue or suture placement. Regular scissors lack this precision and can accidentally cut adjacent sutures or create tissue trauma during thread trimming.
A soft rubber tube can supplement practice for basic knot-tying skills but lacks the tissue layers and resistance characteristics necessary for developing proper suturing technique. It works best as a needle driver practice tool for basic instrument handling rather than comprehensive suture training.
Fragile skin requires modified technique including lighter tissue handling, smaller needle sizes, wider suture spacing to distribute tension, and consideration of horizontal mattress sutures that spread force across larger tissue areas. These adaptations prevent tissue tearing during closure.
Students should establish basic competency through home practice before clinical rotations begin. This preparation allows you to focus on patient interaction and clinical decision-making rather than struggling with basic technical skills during precious medical schools rotation time.