
How to Remove Running Sutures: A Complete Guide
Hoss Agina
Dec 13, 2025
Running sutures require specialized removal techniques that differ significantly from simple interrupted sutures. How to remove running sutures involves understanding the continuous nature of these closures and preventing catastrophic wound dehiscence during the removal process.
Unlike interrupted sutures where each stitch functions independently, running sutures use a single continuous thread that connects multiple wound edges. This design means improper removal can cause the entire suture line to unravel, making proper technique essential for patient safety.
TLDR: Key Points for Running Suture Removal
- Timing matters: Remove sutures based on anatomical location (face 3-5 days, extremities 10-14 days) and evidence of adequate wound healing
- Prevent contamination: Cut sutures on the skin side of knots to avoid pulling contaminated material through clean tissue
- Use proper technique: Convert running locked sutures to individual segments through strategic cutting to prevent complications
- Monitor for complications: Watch for signs of infection, wound dehiscence, or incomplete removal requiring immediate medical attention

Master Your Suturing Skills with A Plus Medics
Ready to build confidence in suturing and wound care techniques? Our All-in-One Suture Practice Kit provides everything you need to master essential medical skills safely and effectively.
Engineered by chemical engineers and designed with input from medical professionals, our comprehensive kit includes realistic practice pads, professional-grade instruments, and step-by-step educational materials. Practice until you achieve mastery with tools that mirror real clinical environments.
Start building your expertise today - because patient safety begins with your skill and confidence in fundamental medical procedures.
Understanding Running Sutures and When to Remove Them
Running suture patterns create efficient wound closure but present unique challenges during removal. The continuous suture material runs beneath the skin surface, making contamination prevention crucial during the suture removal process.
According to NCBI medical guidelines, running sutures offer advantages in speed of application and even tension distribution. However, they carry the significant disadvantage of complete wound dehiscence risk if any portion breaks during removal.
Types of Running Sutures
Several running suture variations exist in clinical practice:
- Simple running sutures - Basic continuous pattern with successive throws
- Running locked sutures - Each throw passes under the previous loop
- Running horizontal mattress - Provides wound eversion
- Running subcuticular sutures - Placed within the dermis for cosmetic closure
Each type requires specific removal techniques to prevent complications and ensure optimal wound healing.
Timing Guidelines for Suture Removal
Proper timing prevents both premature wound dehiscence and excessive scarring. Clinical protocols from Intermountain Healthcare establish clear timelines:
- Face: 3-5 days
- Scalp and neck: 7-10 days
- Arms and trunk: 7-14 days
- Legs: 10-14 days
- Hands and feet: 14-21 days
The healthcare provider must assess for a “healing ridge” - palpable firmness across the wound indicating adequate tissue strength before proceeding with removal.
Essential Equipment and Preparation
Successful suture removal requires proper equipment and sterile technique to minimize risk of infection and ensure patient safety.
Necessary Supplies
- Sterile scissors with curved tips designed for suture removal
- Sterile forceps for grasping suture material
- Antiseptic solution for cleaning the wound site
- Sterile dressing materials including gauze pads
- Steri strips for post-removal wound support
The dominant hand should control the sterile scissors while maintaining easy access to all materials throughout the procedure.
Patient Preparation
Healthcare professionals must explain the removal process to reduce patient anxiety. Most patients experience minimal discomfort - typically a pulling sensation rather than significant pain during suture removal.
Position the patient comfortably with the wound clearly visible under adequate lighting. Verify patient identity and confirm physician orders before beginning any surgical procedures.
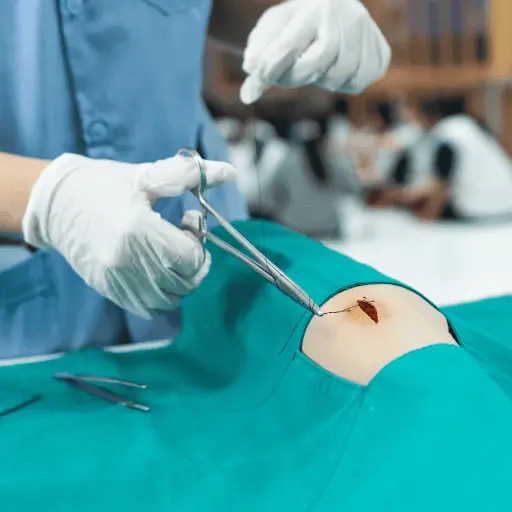
Step-by-Step Removal Techniques
The removal process varies depending on the specific running suture pattern used for wound closure.
Simple Running Suture Removal
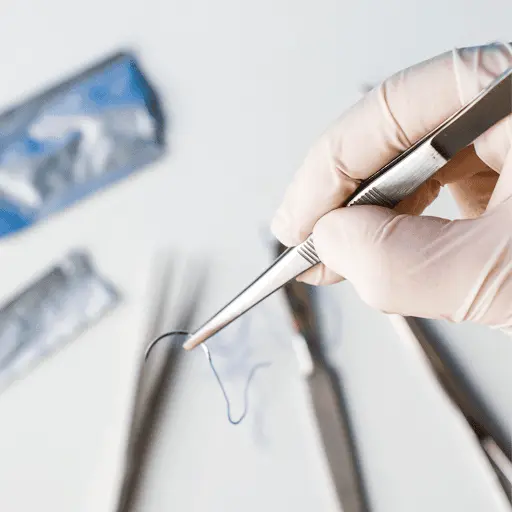
Critical Safety Rule: Never cut both ends simultaneously, as this allows contaminated suture to drag through clean tissue.
- Locate the knotted end of the running suture
- Cut on one side of the knot closest to the skin surface
- Gently pull the knot away from the wound using sterile forceps
- Repeat at the opposite end of the suture line
- Remove the remaining sutures by pulling the continuous thread parallel to the wound
This technique prevents pulling contaminated portions of suture thread through the healing tissue, reducing infection risk significantly.
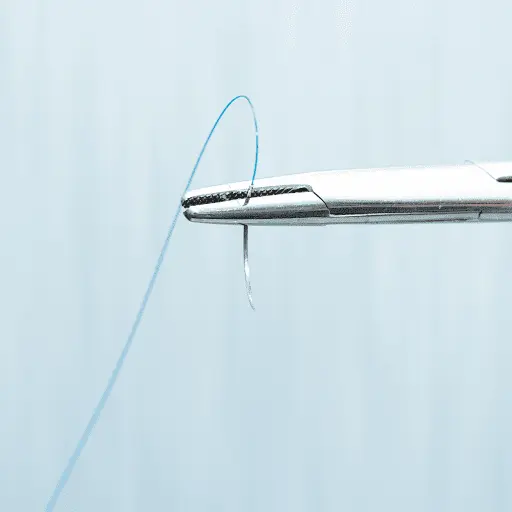
Running Locked Suture Removal
Running locked sutures require a modified approach to prevent dragging long contaminated segments through tissue.
Conversion Technique:
- Cut the suture at multiple points along its length near the skin surface
- Make additional cuts in the middle of each segment between loops
- Remove each segment individually like interrupted stitches
- Pull segments parallel to the wound rather than perpendicular
This process converts the continuous running suture into manageable individual sections, eliminating the risk of pulling extensive contaminated suture material through clean healing tissue.
Running Subcuticular Suture Removal
For absorbable sutures: Trim external portions flush with skin - the internal suture dissolves naturally.
For non-absorbable sutures: Complete removal is necessary using specialized technique:
- Remove any steri strips covering the suture ends
- Cut one end flush with the skin surface
- Use artery forceps with rotational motion rather than straight pulling
- Keep forceps flush to the skin while rotating to prevent breakage
- Apply steri strips immediately after removal for wound support
According to Cleveland Clinic guidelines, subcuticular removal requires extra care to prevent suture breakage within the tissue.
Infection Prevention During Removal
Preventing infection represents the highest priority during suture removal, as visible suture portions harbor skin bacteria that can contaminate the wound.
Key Prevention Principles
Contamination Control: Cut sutures on the side closest to the skin surface to prevent pulling contaminated material through tissue. This crucial skill protects patients from introducing bacteria deep into the healing wound site.
Antiseptic Preparation: Clean the surrounding skin and suture line with antiseptic solution before beginning removal. This reduces the bacterial load around the wound.
Sterile Technique: Use sterile scissors and forceps throughout the procedure. Healthcare providers must maintain clean technique even when facility protocols allow non-sterile approaches.
Post-Removal Wound Care
After removing all the sutures, immediate wound care prevents complications:
- Clean the area gently with antiseptic solution
- Apply steri strips perpendicular to the wound for continued support
- Cover with sterile dressing if needed for protection
- Document the procedure including number of sutures removed
Educational resources about proper suturing techniques can help healthcare professionals understand wound closure principles that inform removal decisions.
Recognizing and Managing Complications
Several complications can occur during or after the removal process, requiring immediate recognition and appropriate intervention.
Wound Dehiscence
Wound dehiscence occurs when the incision opens after suture removal. Signs include:
- Visible separation of wound edges
- Drainage from the wound site
- Patient reports of “popping” sensation
- Exposure of deeper tissue layers
Immediate Management: Apply steri strips to approximate wound edges and contact the physician immediately for potential re-suturing.
Signs of Infection
Monitor for infection indicators that may develop after removal:
- Increased redness or warmth around the wound
- Purulent drainage or unusual discharge
- Swelling beyond normal healing parameters
- Patient reports increased pain or discomfort
- Systemic signs like fever or malaise
According to NCBI research on surgical site infections, most superficial infections manifest within 3-7 days following the procedure.
Incomplete Suture Removal
Leaving suture fragments in tissue can cause:
- Foreign body reactions
- Delayed healing process complications
- Chronic inflammation and discomfort
- Secondary infection at the retained material site
Meticulous attention during removal prevents this complication by ensuring complete extraction of all suture material.
Professional Scope of Practice
Healthcare providers must understand their legal authority for performing suture removal within their professional scope.
Registered Nurse Authority
Registered nurses can remove sutures with proper physician delegation and demonstrated competency. Clinical nursing resources outline the educational requirements and supervision needed.
Requirements:
- Explicit physician order for removal
- Documented competency in technique
- Understanding of complications and appropriate responses
- Knowledge of when to stop and seek medical attention
Licensed Practical Nurse Limitations
LPNs/LVNs can remove sutures only with specific training and appropriate supervision. Independent removal typically falls outside their scope of practice in most jurisdictions.
Advanced Practice Considerations
Nurse practitioners and physician assistants can independently assess wound readiness, remove sutures, and manage post-removal complications within their scope of practice.
Understanding these professional boundaries ensures patient safety and legal compliance during suture removal procedures.
Special Patient Populations
Certain patient groups require modified approaches during suture removal to optimize outcomes and prevent complications.
Diabetic Patients
Diabetes affects wound healing and increases infection risk. These patients may require:
- Extended suture retention periods
- More frequent wound assessment
- Enhanced infection prevention measures
- Closer post-removal monitoring
Immunocompromised Patients
Patients on steroids, chemotherapy, or with immune system disorders demonstrate delayed healing requiring:
- Longer healing times before removal
- Extra attention to sterile technique
- Extended post-removal monitoring
- Lower threshold for physician consultation
Pediatric Considerations
Children may experience increased anxiety during removal. Strategies include:
- Parent/caregiver presence for comfort
- Distraction techniques during the procedure
- Age-appropriate explanations of the process
- Recognition that children may form more prominent scars
Anticoagulated Patients
Patients on blood thinners require attention to:
- Increased bleeding risk during removal
- Extended pressure application if bleeding occurs
- Careful wound monitoring after removal
- Immediate physician notification for excessive bleeding
Advanced Techniques and Troubleshooting
Complex situations may require modified approaches beyond standard removal techniques.
Retained Sutures
When sutures break during removal, remaining fragments require careful management:
- Document the location of retained material
- Notify the physician immediately
- Monitor for signs of foreign body reaction
- Consider surgical removal if complications develop
Difficult Visualization
Poor lighting or wound location may complicate removal:
- Improve lighting with additional sources
- Position patient for optimal access
- Use magnification if available
- Consider physician assistance for challenging locations
Patient Intolerance
Some patients cannot tolerate the removal process:
- Provide emotional support and reassurance
- Consider topical anesthesia if ordered
- Take breaks during lengthy procedures
- Modify positioning for patient comfort
The history and evolution of surgical sutures demonstrates how techniques have developed to minimize patient discomfort while maintaining safety.
Post-Removal Patient Education
Comprehensive patient education after suture removal promotes optimal healing and prevents complications.
Activity Restrictions
Patients should understand limitations during continued healing:
- Avoid strenuous activity that stresses the wound
- Limit lifting and pulling motions
- Protect from excessive moisture including swimming
- Follow specific restrictions based on wound location
Wound Care Instructions
Daily wound care continues after removal:
- Gentle cleansing with soap and water
- Pat dry rather than rubbing the area
- Apply thin petroleum jelly if recommended
- Cover with clean bandage until fully healed
Scar Management
Early scar care improves long-term cosmetic outcomes:
- Use sunscreen consistently to prevent darkening
- Begin massage 2-4 weeks after removal
- Apply gentle pressure during massage
- Monitor for excessive scarring requiring treatment
When to Seek Medical Attention
Patients must recognize concerning symptoms:
- Signs of infection including fever, drainage, or increased pain
- Wound separation or opening
- Excessive bleeding that doesn't stop with pressure
- Unusual drainage or odor from the wound site
Quality Assurance and Documentation
Proper documentation ensures continuity of care and legal protection for healthcare providers.
Essential Documentation Elements
Complete records should include:
- Number of sutures removed and their condition
- Wound assessment before and after removal
- Patient tolerance of the procedure
- Post-removal wound appearance
- Instructions provided to the patient
- Any complications encountered during removal
Follow-up Planning
Appropriate follow-up prevents missed complications:
- Schedule return visits based on wound characteristics
- Provide clear contact instructions for problems
- Coordinate with physician for complex cases
- Document education provided about warning signs
Understanding proper documentation protects both patients and healthcare providers while ensuring optimal wound outcomes.
Frequently Asked Questions
The removal process usually takes 5-15 minutes depending on the length of the suture line and complexity of the wound. Simple running sutures on small wounds may be removed in just a few minutes, while longer or more complex closures require additional time for careful technique execution.
Suture removal should only be performed by trained healthcare professionals or under their direct supervision. Home removal risks serious complications including infection, incomplete removal, and wound dehiscence that could require emergency medical attention.
Contact your healthcare provider immediately if you notice increased redness, warmth, swelling, purulent drainage, fever, or worsening pain. These symptoms may indicate infection requiring prompt medical evaluation and possible antibiotic treatment.
Healthcare providers assess wound readiness by feeling for a "healing ridge" - firm tissue beneath the incision indicating adequate strength. Patients should not attempt this assessment themselves, as professional evaluation prevents premature removal that could cause wound opening.
Professional medical education programs provide comprehensive training in suture removal techniques. Healthcare students and professionals can access educational videos through accredited medical training platforms and institutional learning management systems.
Individual pain tolerance varies significantly between patients. Factors affecting discomfort include wound sensitivity, patient anxiety levels, suture type and location, and the skill of the healthcare provider performing the removal. Most patients report only mild pulling sensations during the process.